What You'll Learn
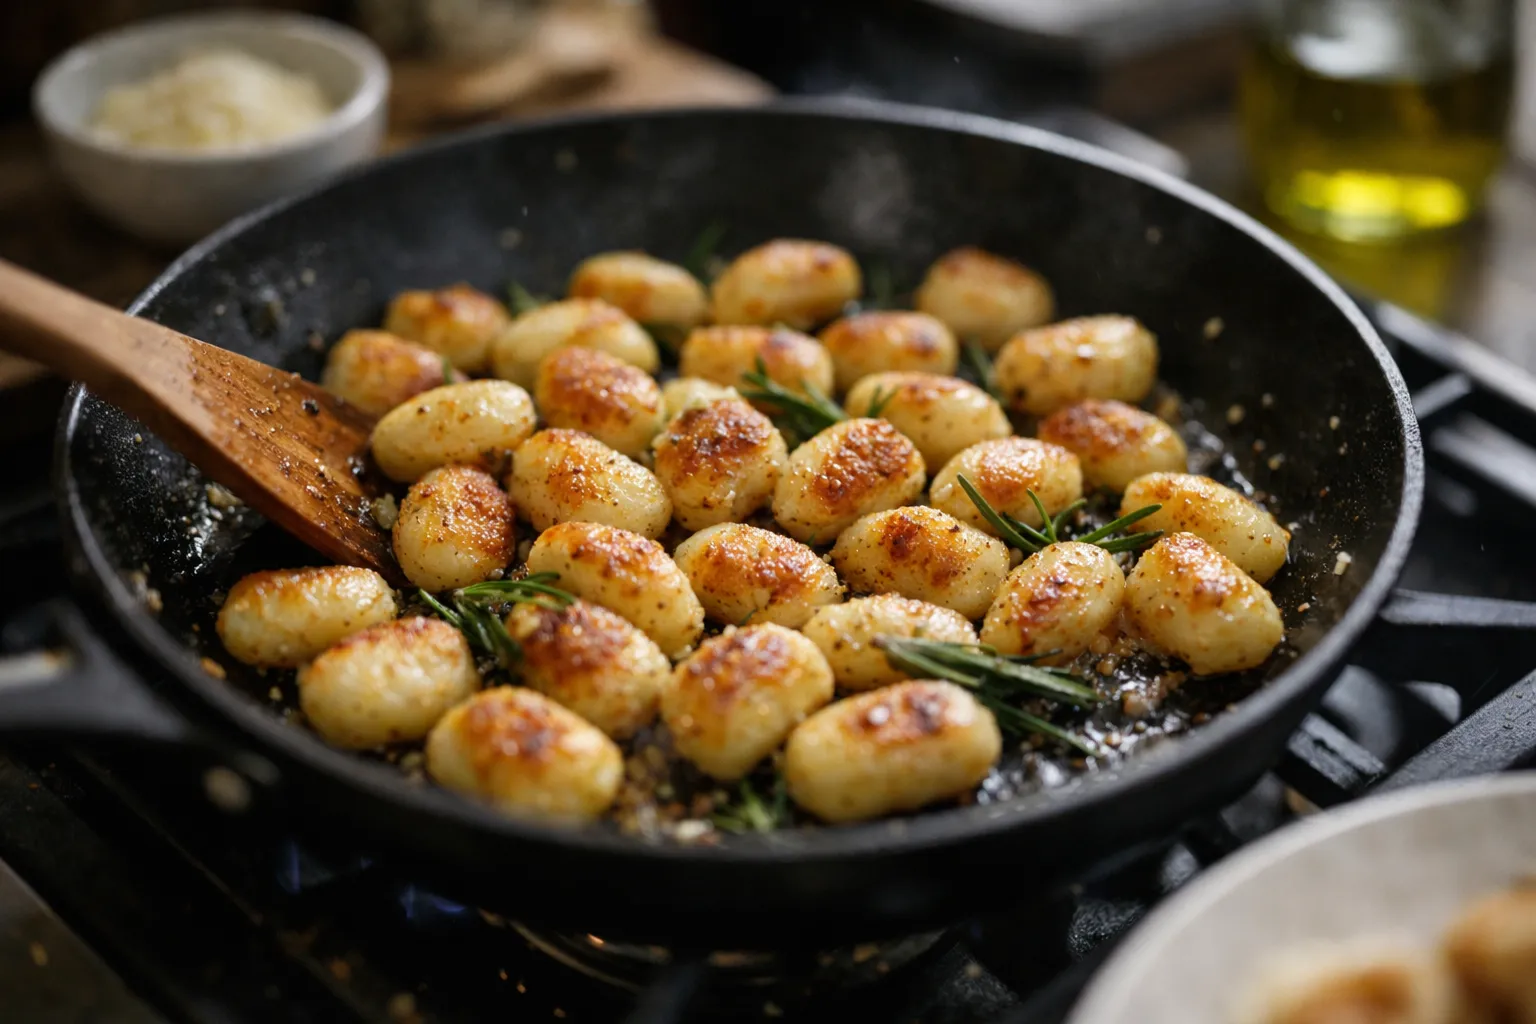
You will learn two proven pan‑fry methods (boil‑then‑sear and straight from frozen), a third air‑fryer option popular in 2026, plus updated prep, storage and safety tips so your store‑bought gnocchi comes out with a crisp golden crust and a tender, pillowy center every time.
What You'll Need
- Time: 20–30 minutes (or 30–40 if you plan a flash‑freeze step)
- Ingredients: 1 lb (450 g) store‑bought potato or gluten‑free gnocchi; 2–3 tbsp neutral high‑smoke‑point oil (grapeseed, sunflower) or light olive oil; 1–2 tbsp unsalted butter or vegan butter; 2–3 cloves garlic (optional); salt, pepper, fresh herbs, grated cheese or nutritional yeast
- Equipment: 10–12" skillet (cast‑iron or stainless steel recommended), slotted spoon, rimmed baking sheet, paper towels or kitchen towel, spatula. Optional: air fryer (recommended model with 10–13 qt basket for even circulation) and an infrared thermometer for exact pan temp (useful but not required).
Why update this method in 2026?
Since 2020, frozen and convenience-packed fresh pasta categories have expanded and diversified—more vegan and certified gluten‑free gnocchi are widely available. Home cooks also favor low‑oil, air‑fryer techniques. These shifts change texture expectations and technique choices: you can now choose between ultra‑chewy, flash‑seared gnocchi, or a crisped, pillowy result that mimics restaurant plating. The steps below reflect those choices and current kitchen practice for flavor and safety.
Step‑By‑Step Instructions
Method A — Boil then pan‑fry (most reliable — best pillowy interior)
- Bring a large pot of salted water to a gentle boil. Add gnocchi and cook until they float plus 10–20 seconds (follow package guidance). Fresh‑style gnocchi usually take 2–3 minutes; frozen will take longer if thawed.
- Transfer with a slotted spoon to a rimmed baking sheet lined with paper towels. Spread in a single layer and let sit 3–5 minutes to steam off surface moisture. For extra‑crisp results, chill uncovered in the fridge for 10–15 minutes to firm the surface.
- Heat your skillet over medium‑high for 2 minutes. Add 2 tbsp oil; when it shimmers (or reaches roughly 350–375°F with an infrared thermometer), add gnocchi in a single layer — don’t overcrowd. You may need two batches.
- Leave undisturbed 2–3 minutes until the bottoms are deeply golden. Flip or shake the pan and brown the other sides 2–3 minutes. Add butter and sliced garlic in the final 30–60 seconds so the butter browns and the garlic softens without burning.
- Season with salt and pepper, toss with 1–2 tbsp chopped herbs (sage, parsley, or chives), finish with grated Parmesan or nutritional yeast, and serve immediately.
Expected result: golden, deeply caramelized crust with a tender, pillowy interior.
Method B — Sear straight from frozen (fast, low prep)
- Heat 3 tbsp oil over medium‑high heat until shimmering. Add frozen gnocchi in one layer; do not thaw.
- Sear undisturbed 3–4 minutes until the bottoms brown. Stir and continue turning for 6–8 minutes until heated through and most pieces are golden. This produces a slightly chewier center but saves time.
- Finish with butter, garlic, herbs and seasoning as above. If the pan becomes crowded, finish in a hot oven (425°F) for 4–6 minutes to crisp without extra oil.
Expected result: faster method with good exterior browning; centers will be firmer than boiled‑then‑seared gnocchi.
Method C — Air‑fryer finish (2026 favorite for less oil)
- If using boiled gnocchi: after step 2 of Method A (pat dry), toss gnocchi with 1 tbsp oil and spread in a single layer in the air‑fryer basket.
- Air fry at 400°F (200°C) for 6–10 minutes, shaking halfway, until edges are golden and crisp. For frozen gnocchi, increase to 10–14 minutes, shaking every 4 minutes.
- Toss with hot butter or herb oil off‑heat and finish with cheese or nutritional yeast.
Expected result: crisp exterior with noticeably less surface oil; good for cooks minimizing pan splatter or calories.
Updated Quick Sauce Pairings (2026 twists)
- Brown butter, lemon & capers: Brown butter, add lemon zest and capers to cut richness—trendy in 2024–26 for balancing starches.
- Charred cherry tomato and basil: Use blistered tomatoes tossed hot with garlic and chili flakes; finishing with basil keeps the dish bright.
- Umami mushroom toss: Sear sliced creminis in the same pan, deglaze with a splash of white wine, toss with gnocchi and thyme.
Dietary modifications
- Vegan: Choose store‑label vegan gnocchi, use oil or vegan butter, and nutritional yeast for savory finish.
- Gluten‑free: Certified gluten‑free potato or cassava gnocchi browns the same way; avoid overboiling as some gf brands absorb water faster.
- Lower oil: Use Method C (air fryer) or reduce oil to 1 tbsp and finish with a light spray of olive oil and extra herbs for flavor.
Troubleshooting & Pro Tips (2026 updates)
- Mushy gnocchi: Likely overboiled or crowded. Boil only until they float plus a few seconds; pat dry and fry in batches. Flash‑chilling on a tray firms the exterior for better browning.
- Uneven browning: Use a heavy pan (cast‑iron or thick‑bottomed stainless) and ensure the oil is hot enough. An infrared thermometer reading of 350–375°F at the pan surface is ideal for crisping without burning.
- Burned garlic: Add garlic at the end or infuse minced garlic into warm butter off‑heat, then toss quickly to avoid bitter char.
- Too oily: Drain briefly on paper towels and finish in a clean pan over medium heat to evaporate excess oil and reconcentrate flavor.
Make‑ahead, storage & reheating (practical 2026 guidance)
Cooked pan‑fried gnocchi keeps 2–3 days refrigerated. To restore crispness, reheat in a skillet over medium with a splash of oil (3–5 minutes), or air‑fry at 350°F for 4–6 minutes. Avoid microwaving if you want to preserve texture.
To prep ahead for weeknight speed: parboil gnocchi, spread on a sheet pan to cool, then flash‑freeze in a single layer and pack into freezer bags. When you want to cook, sear from frozen (Method B) or air‑fry directly.
Why avoid excessive charring?
While deep browning improves flavor, avoid heavy blackening—both for taste and health considerations. Achieve Maillard‑type browning (gold to deep amber) rather than carbonized black. Browned butter and controlled searing give the best flavor without overcooking.
Putting it on the table
Serve as a main with a crisp green salad and lemon vinaigrette, or as a side to roast chicken, pan‑seared fish, or sautéed greens. Finish with a scattering of fresh herbs and a quick grating of aged cheese or a dusting of nutritional yeast for a bright, savory finish.
Next steps
Try each cooking method once to decide which texture you prefer. Use the flash‑chill trick to push surface browning further, and experiment with the air‑fryer finish for a lighter option. If you cook in batches, reheat only what you’ll serve to keep leftovers crisp.
Frequently Asked Questions
Do I need to boil gnocchi before pan‑frying?
No—boiling first gives the softest interior and is the most reliable way to get a pillowy center. Searing from frozen skips boiling and saves time but yields a firmer chew. For best of both, parboil, dry, then pan‑fry or air‑fry.
Can I pan‑fry gluten‑free gnocchi the same way as wheat gnocchi?
Yes. Certified gluten‑free gnocchi (potato or cassava based) browns similarly, but some absorb water faster; watch cooking time and pat dry thoroughly before searing to avoid mushiness.
What's the best pan for even browning?
Cast iron or heavy stainless‑steel pans hold steady heat and produce more even, deep browning. Nonstick works, but you’ll get the best crust with a heavier pan and a little more oil.
How can I get extra‑crisp gnocchi without more oil?
Use the air‑fryer method, flash‑chill parboiled gnocchi to firm the surface, or finish in a very hot oven (425°F) on a rimmed sheet for several minutes. These steps reduce oil while preserving crispness.