
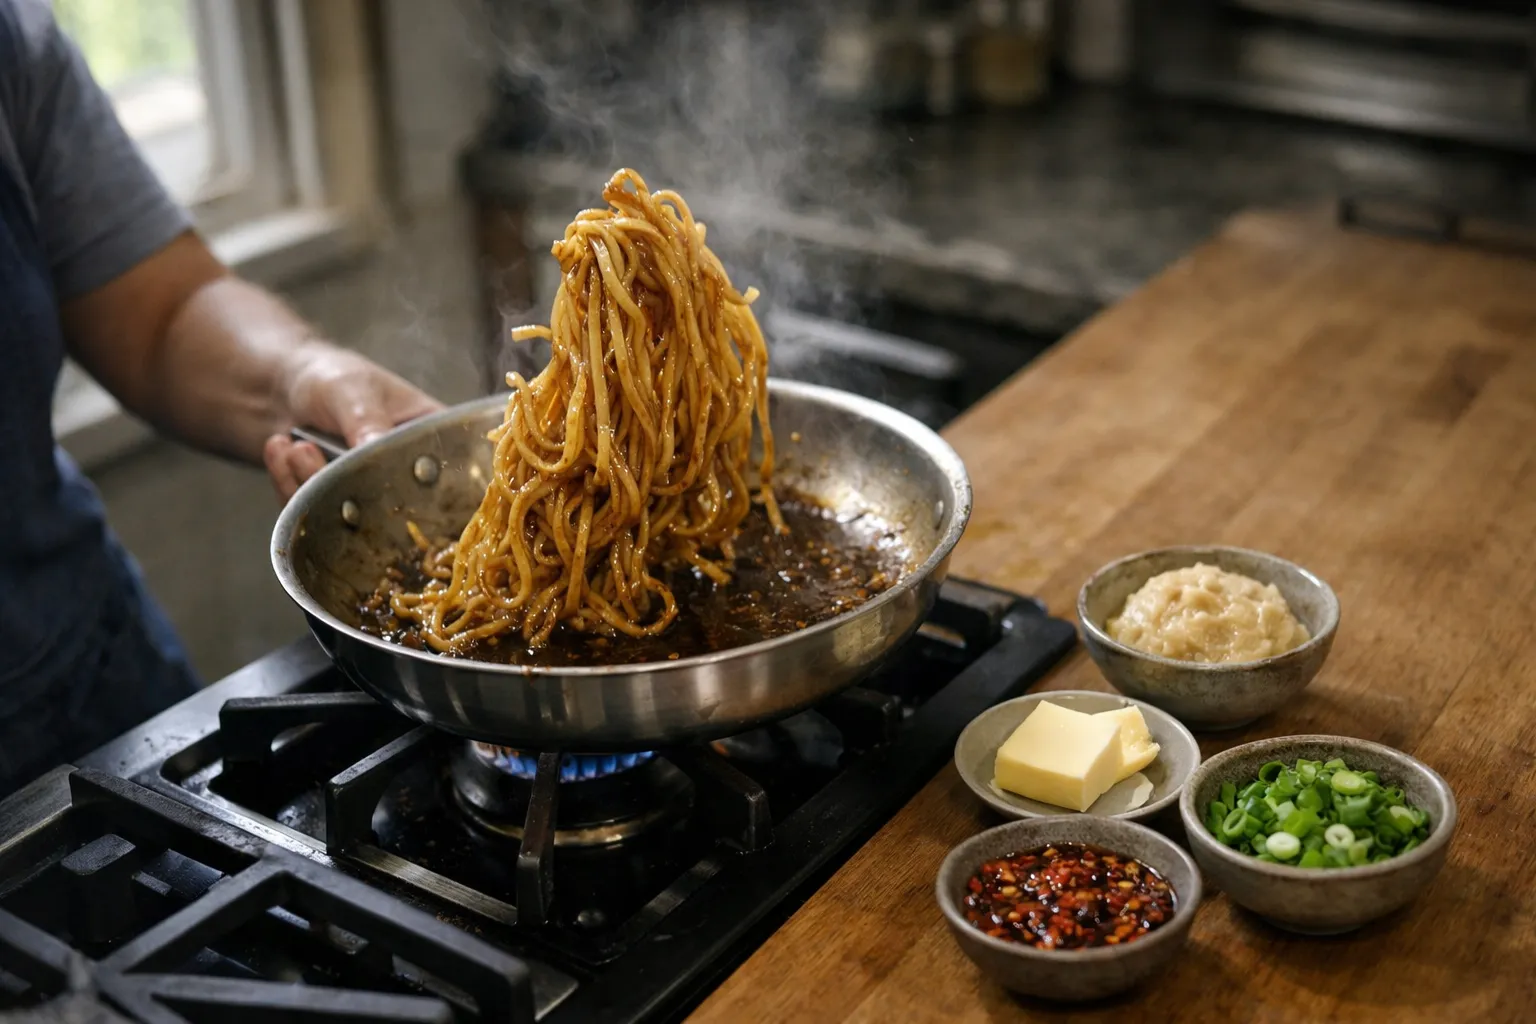
Hello—I'm Maria Santos. I learned to cook at my grandmother’s side, and this miso‑butter noodle bowl is the kind of weeknight food she would have loved: fast, bright, and deeply satisfying. This update (June 2026) keeps the 15‑minute promise while adding fresh pantry guidance, health and sustainability notes, and a few small tech and ingredient updates I’ve tested this year.
What you’ll learn: a dependable miso‑butter sauce ratio, how to time noodles and one of three fast proteins (jammy eggs, seared shrimp, crispy tofu), quick veg ideas, and 2026‑relevant tips on sodium, labels, and kitchen shortcuts so you'll get a restaurant‑quality bowl with minimal fuss.
Prerequisites / Context: What to know before you start
Why this still matters in 2026: fermented flavors and umami remain a mainstream interest—miso is now widely available in supermarkets and many brands include clearer labeling for sodium and allergens. At the same time, more households have induction stoves and smart kettles that shave minutes from prep. Two practical facts to set expectations:
- Sodium and health: Miso is salty; the World Health Organization recommends keeping daily salt intake below 5 g (about 2,000 mg sodium). If you are watching sodium, look for jars labeled “reduced sodium” or start with less miso and taste (I give amounts below).
- Labeling and gluten: Some miso varieties contain barley or wheat. In 2026 many brands now label gluten content—choose rice miso or jars specifically labeled “gluten‑free” if needed.
Tools you need: a pot, a skillet or sauté pan, tongs, a small whisk or fork, and a heatproof spoon. Optional but helpful in 2026: an electric kettle (for faster hot water), an induction cooktop for quick searing, or a small immersion blender to rescue a stubbornly separated sauce.
Serves: 2 large bowls. Prep: 5 minutes. Cook: about 10 minutes depending on noodles and protein.
Step 1: Choose noodles that match the 15‑minute plan
Match noodle cooking time to your protein choice. Work backward: if noodles cook 9–11 minutes, choose eggs or a protein you can start ahead. If you want to maintain the strict 15‑minute window, pick noodles that cook 2–6 minutes.
- Fresh ramen / refrigerated noodles: 2–4 minutes. Glossy sauce clings beautifully.
- Vacuum‑packed udon: 1–3 minutes for many pouches; chewy and satisfying.
- Soba (check label for 100% buckwheat): 4–6 minutes. Rinse briefly after cooking to stop carryover.
- Rice noodles: 3–6 minutes depending on width—some require a short soak then a quick dunk.
- Dried pasta (spaghetti): 9–11 minutes—use only if you start it first and keep strict timing.
Pro tip: In 2026 single‑serve fresh noodle pouches with clear cook times are common from mainstream retailers—use them on busy nights for predictable results.
Step 2: The miso‑butter ratio that always works (and why)
Memorize this template; I’ve tested it across noodle types and proteins so you can finish by smell and sight.
Miso‑Butter Sauce (2 servings):
- 2 tablespoons white (shiro) miso — start with 1½ if brand seems strong
- 2 tablespoons butter or vegan butter (for dairy‑free use a cultured plant butter or 1 tbsp olive oil + 1 tbsp tahini)
- 1–2 teaspoons honey or brown sugar (optional; useful for assertive miso)
- 1 teaspoon rice vinegar or lemon juice
- 2–4 tablespoons hot, starchy noodle water (emulsifier)
- Optional: 1 teaspoon toasted sesame oil; 1–2 teaspoons chili crisp or 1 teaspoon gochujang for heat
Why it works: miso supplies umami and salt, butter delivers fat and aroma, and hot noodle water gives you the starch that binds fat and water into a glossy emulsion that clings to each strand. If the sauce separates, add hot water a tablespoon at a time and whisk or toss until glossy.
Visual cue: The finished sauce should be a thin, caramel‑colored lacquer with sheen—not a greasy puddle. If it looks greasy, keep whisking with hot water and lower the heat.
Step 3: Time the cook like a pro (sequential, no waiting)
- Bring water to a boil: If using dried pasta, salt the water lightly. For fresh noodles or refrigerated ramen, you can skip salting since miso adds salt.
- Start the sauce off‑heat: In a skillet over low heat melt butter; remove from direct heat and whisk in miso (this prevents scorching). Add sweetener and vinegar.
- Cook noodles: Drop noodles once water boils. Set a timer and stick to it—this is your pacing.
- Reserve water: Before draining, scoop out ½ cup of hot noodle water (or use tongs to bring noodles directly to the pan).
- Emulsify: Add 2 tablespoons of the hot water to the pan and whisk until glossy; add more water a tablespoon at a time to reach lacquer texture.
- Toss: Add noodles and toss until each strand is coated. Adjust with vinegar for brightness and miso for salt as needed.
Don’t skip this: Keep the pan off high heat when miso touches it—miso burns easily and turns bitter. Low and glossy wins every time.
Step 4: Pick a protein path (three fast options)
Each route is timed to match the noodle and sauce flow. Pick based on appetite and what's in your fridge.
Option A — Jammy fried eggs: fastest, coziest
Ingredients: 2–4 eggs, pinch of salt, neutral oil or butter.
- While the noodles cook, heat a small skillet over medium‑low with a splash of oil or butter.
- Crack eggs and cook gently until whites are set but yolks still jiggle—about 3–4 minutes for sunny‑side (cover for 30–45 seconds to set whites without hardening yolks).
- Slide eggs onto finished noodles; breaking the yolk into the bowl enriches the sauce and adds silkiness.
Sensory cue: Butter and egg yolk create a warm, savory aroma; the yolk should spread through the noodles and turn the sauce silkier. For immunocompromised diners, cook yolks through until firm.
Option B — Quick shrimp: 6‑minute upgrade
Ingredients: 8–10 oz peeled shrimp, salt, pepper, optional garlic or ginger.
- Pat shrimp very dry—this is crucial to sear rather than steam.
- Sear in a hot skillet with a little oil: 1–2 minutes per side until opaque and forming a loose “C.” Remove and set aside.
- Build the miso‑butter sauce in the same pan, toss noodles, then add shrimp back just to warm through.
Safety and sourcing note: USDA guidance recommends cooking seafood to 145°F until opaque; in practice, visual cues (opaque flesh, loose “C” shape) work well at home. For sustainability, look for ASC, MSC, or BAP labels on frozen shrimp; frozen shrimp often arrives with more consistent quality and cooks faster.
Option C — Crispy‑edged tofu: plant‑based and satisfying
Ingredients: 8–10 oz extra‑firm tofu, pinch of salt, 1 tbsp cornstarch (optional), oil.
- Quick press: wrap tofu in a towel and press under a plate for 2–3 minutes—this removes surface moisture and speeds browning.
- Cube and toss with salt and cornstarch for extra crisping.
- Pan‑fry in oil over medium‑high until golden on multiple sides, 6–8 minutes total; remove and set aside.
- Make the sauce, toss noodles, then return tofu so it retains some crisp edges.
Texture cue: Golden, slightly pillowy interiors with crisp corners. If pieces stick, the pan wasn’t hot enough or you moved them too soon—let a crust form.
Step 5: Add vegetables without adding dishes
This bowl is perfect for clearing the fridge. Choose quick‑cooking veg or no‑cook finishes.
- Fast sauté: baby spinach (30 seconds), shredded cabbage (2–3 minutes), thinly sliced mushrooms (3–4 minutes)
- Blanch in noodle water: broccoli florets (1–2 minutes), snap peas (30–60 seconds)
- No‑cook: cucumber ribbons, shredded carrots, scallions, cilantro, toasted sesame seeds
Pro move: In the final 60 seconds of noodle cooking, drop in a handful of spinach or snap peas to blanch—same pot, minimal cleanup, and the vegetables keep vibrant color and bite.
Common mistakes (and how to fix them)
- Sauce separates or looks greasy: Add hot noodle water 1 tablespoon at a time and whisk or toss vigorously until it re‑emulsifies. If it still resists, an immersion blender run for 5–10 seconds will bring it together.
- Too salty: Add more noodles or veg, a squeeze of citrus, and a splash of starchy water. Next time, start with 1½ tablespoons miso and taste before adding the rest.
- Miso clumps: Remove the pan from high heat when stirring in miso. If clumps form, whisk in a tablespoon of hot water off the heat to smooth.
- Noodles clump: Move them straight from pot to pan with tongs or toss with a teaspoon of oil if they must wait.
- Tofu tears: Give it time to develop a crust; use enough oil and don’t flip repeatedly.
Pro tips — small moves that lift the bowl
- 2‑2‑2 checkpoint: 2 tbsp miso + 2 tbsp butter + 2 tbsp noodle water is a reliable baseline—then tweak texture and salt.
- Finish with aroma: A few drops of toasted sesame oil, a squeeze of lime, or a pinch of yuzu kosho right before serving elevates the bowl.
- Layer heat: Dot chili crisp on top for crunchy bursts; stir a small amount into the sauce for even warming.
- Make‑ahead paste: Mix miso + softened butter + sweetener into a jar and refrigerate up to 5 days; loosen with hot water at the stove. Commercial single‑serve miso packets are now common and work well on busy nights.
- Diet swaps that still feel complete: Dairy‑free: cultured vegan butter + tahini. Gluten‑free: rice noodles or certified buckwheat soba and check miso label. Lower sodium: reduced‑sodium miso or cut miso by 25% and boost acid at the end.
- Quick press for tofu: Even 1–2 minutes of pressing under weight helps—no need for an hour.
FAQ
Can I prepare parts of this ahead for faster weeknights?
Yes. Make a miso‑butter paste (miso + softened butter + sweetener) and store it in a jar for up to 5 days; loosen with hot water when cooking. You can also press and cube tofu ahead, or peel and portion raw shrimp into single‑serve bags and keep frozen until needed. Prepackaged fresh noodles or single‑serve noodle pouches cut active time significantly.
Which miso should I buy if I'm new to it?
Start with white (shiro) miso—it's mild, slightly sweet, and easy to balance. If you need low sodium or gluten‑free, look for jars labeled “reduced sodium” or “gluten‑free.” Rice miso is a good gluten‑free option. When in doubt, start with 1½ tablespoons for two servings and taste before adding more.
How can I control sodium without losing flavor?
Use reduced‑sodium miso when available, start with less miso, and boost brightness with rice vinegar or citrus at the end. Adding more vegetables or a cooked grain dilutes perceived saltiness. Remember the WHO recommendation: aim for under 5 g salt per day overall—so adjust portions and frequency if you eat miso bowls often.
What are reliable signs that shrimp or eggs are safely cooked?
Shrimp are done when opaque, firm, and curled into a loose “C.” USDA guidance recommends cooking seafood to 145°F; a thermometer confirms this. Eggs with runny yolks are fine for most people, but immunocompromised diners should have yolks cooked through (firm).
I forgot to save noodle water—any substitutes?
Hot tap water will do in a pinch but lacks starch. To compensate, whisk in 1 teaspoon tahini or peanut butter for body, or mix 1 teaspoon cornstarch with 1 tablespoon cold water and stir that into 2–3 tablespoons hot water to create a quick slurry before adding to the sauce.
Kitchen note: My grandmother always told me: “Save the water.” That starchy cup is the quiet hero—without it, your sauce will slip. I still scoop it every time. Trust it.
Final reassurance: this bowl is forgiving. Taste as you go, keep the heat low when miso is near the pan, and don’t fear small adjustments. If you want, try a batch with jammy eggs the first night, then swap to tofu for a plant‑forward version later in the week—same sauce, new life. Happy cooking.